Creating an Interactive Portfolio with Spline3D and Wix: A Challenge in 3D Game Design
- Aug 10, 2025
- 15 min read
Updated: Apr 22

Why I Decided to Create a 3D Interactive Portfolio with Spline
It’s been about a year since I became a Spline Expert Designer. In June 2025, Spline held an event called the Spline Hackathon.
I was already planning to start my next personal Spline 3D project, so I decided to take advantage of the one-week timeframe and create an interactive portfolio using Spline’s game control features.
Since I wanted to keep this project as a permanent part of my portfolio even after the hackathon, I began development with the intention of integrating it into my existing Wix Studio portfolio website.
For this project, I set some personal rules for myself when using Spline:
All 3D objects must be modeled entirely within Spline, without using any external 3D assets (obj, fbx, etc.).
The project must be responsive and operable on both smartphones and tablets.
It must utilize Spline variables and game control features.
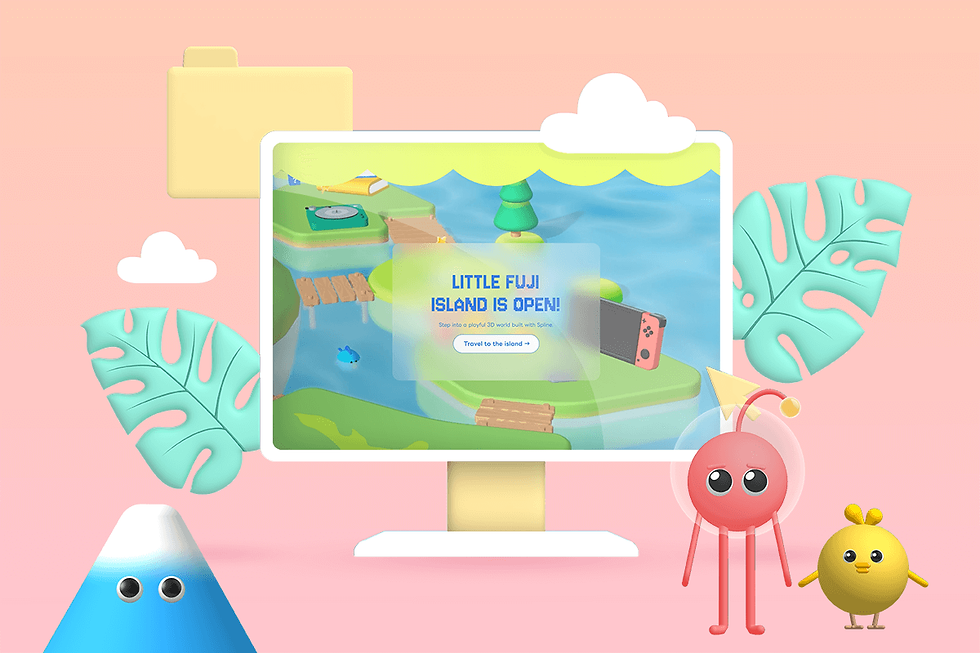
You can explore the completed Spline 3D interactive portfolio here:
Here’s the promotional video (with background music).
Concept and World-Building for the 3D Interactive Portfolio
When creating an interactive portfolio, I started by brainstorming the world-building concept.
The advantage of a personal project is the creative freedom to design however I like—but since there was a tight deadline, I first decided on a clear concept.
Concept: A small island filled with my spark of creativity
The first idea I came up with was to create “a small world filled with my personality—an interactive portfolio that users would want to explore and learn more about me on their own.”
Rather than a one-way portfolio that simply displays works, an introduction, and skills, I wanted to take full advantage of Spline by incorporating as many interactive elements as possible—features that respond to external actions like user clicks, creating a two-way experience.
Since I love tropical seas, I chose an ocean-and-island setting for the environment.
Each island would have a different theme.
As visitors explored the islands, they would discover information about my services and skills, along with personal touches—like my favorite music, hobbies, and sources of inspiration—to help create a stronger connection.
I jotted down several ideas for these themes.

At first, ideas such as a kitchen or an airport were also considered.
Since text information can be cumbersome to handle directly within a 3D scene, I decided to display it as pop-ups in Wix Studio during the final integration.
The overall tone, character design, and world-building were aligned with LITTLE FUJI’s brand design—simple, cute, cheerful, and colorful.
I also wanted to push the “limits of Spline” to the point where people would think, “I can’t believe this was all done in Spline!”
For that reason, all modeling was done entirely within Spline (although Spline can import 3D models in obj or fbx formats).
To keep the 3D scene’s file size small, I aimed for low-poly modeling with minimal mesh counts, creating objects primarily by combining basic shapes as the foundation of the design process.
Tools Used
The tools for this project were Spline3D, Wix Studio, and Figma.
In Figma, I gathered references, created a mood board, and confirmed the fonts to use.

From experience, collecting plenty of reference images before modeling makes the 3D design process much smoother.
Spline 3D Design: Production Process
I divided my work into stages:
Field Design – Designing the islands players can explore
Modeling, Materials, and Animations – Creating all 3D assets in Spline
Game Controls – Configuring player movement and interactions
Variables & Interactive Settings – Adding real-time elements and collectibles
Integration with Wix Studio – Connecting 3D interactions to the website
① Field Design: Island Layout and Camera Setup
I began with the terrain and environment—placing placeholder objects to test island sizes and layouts.
I ensured it worked for both desktop and mobile views, using a slightly vertical circular arrangement for mobile compatibility.

Camera Placement and Island Layout for Both Mobile and Desktop
At this stage, I also set up the camera positions, experimenting to find angles that would show the entire island in the final composition.
I wanted the Spline scene to be enjoyable on both desktop and mobile devices, so I considered how it would look in a vertically oriented smartphone view.
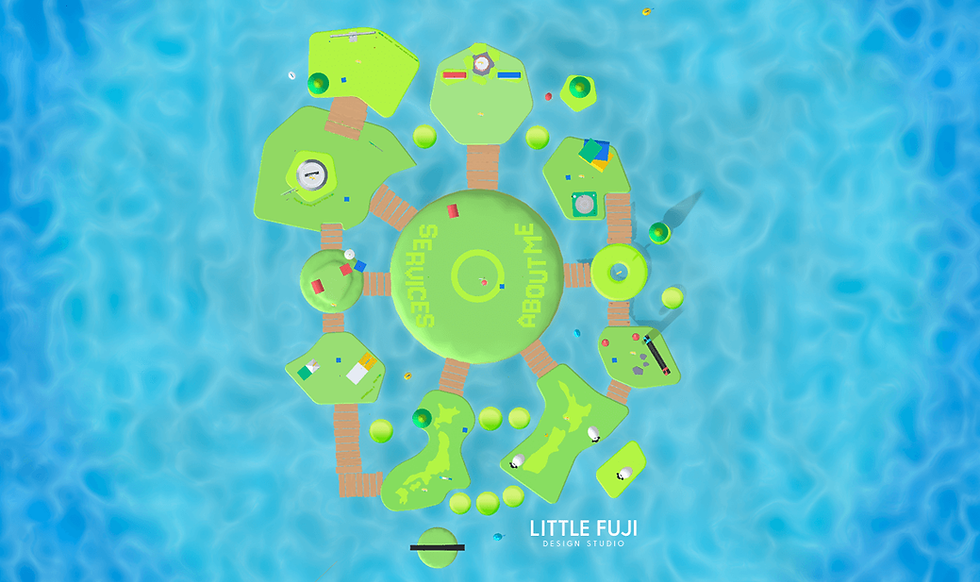
In the end, I chose a slightly elongated circular arrangement.
Two camera types were set: a perspective camera for an immersive viewpoint and an orthographic camera for an angled, top-down view—allowing visitors to switch between the two.
Island Structure and Theme Planning
Surrounding the central starting island are islands of various sizes.
To make the layout intuitive, I divided the map so that the islands on the left focus on business-oriented content—primarily service introductions—while the islands on the right form a personal “About Me” area.
Each island was assigned a main theme. For the service introduction area, I matched the structure of the LITTLE FUJI website, choosing three categories: Web Design, Animation, and 3D Design.
I did not include Graphic Design this time, as it overlaps with other areas.
In the “About Me” section on the right side, I chose themes that reflect my favorite things and strong personal influences:
Books
Games
Music
I also wanted to highlight my unique background as a designer from Japan now living in New Zealand, so I added islands shaped like Japan and New Zealand.
Each main island varies in size and elevation to enhance the 3D feel, and they are connected with bridges and stairs to allow smooth navigation between them.
Field Design (Island Terrain and Sea)
After deciding on the island layout and each theme, I moved on to field design—setting up the materials for the island terrain, ground surfaces, and background sky.
To keep the Spline 3D scene size as small as possible, I used depth layers to create the two-tone color scheme of grass and soil on the island surfaces, instead of adding separate objects.
This allowed most islands to be made from a single object while still achieving the layered, two-color look.
One of the points I was particularly committed to in this design was the sea material.
I repeatedly adjusted it until I was satisfied—capturing the surface wave patterns, subtle animation, and a beautiful tropical blue gradient with transparency, reminiscent of a southern island ocean.
I think the gradient, which becomes a deeper blue the farther it goes, turned out well.
To make the blue of the sea and the bright yellow-green of the islands stand out, I set the background sky color to a lighter tone.
② 3D Modeling, Materials, and Animation Settings in Spline
Once the islands and ocean—which make up most of the Spline scene—were finalized, I moved on to modeling the smaller objects and setting their materials.
Since I decided to use loop animations for this project, I completed the modeling, material settings, and animations all in one go.
3D Modeling and Material Settings for the Bridges Connecting the Islands
To optimize the Spline scene size, I used cloned objects to build the bridges between islands with the same basic shape.
To add variety, I slightly rotated each wooden plank and shifted their positions.
A slightly uneven, irregular arrangement makes it feel more realistic.
While this project’s style is the opposite of photorealism, I believe adding subtle “real-world” details can make the 3D design feel more lively and engaging.

I considered using image textures to create the wood grain pattern on the planks, but since that would increase the number of objects and the overall scene size, I opted to create the pattern using layered patterns instead of images.

Personally, refining materials is my favorite part of the process.
While Blender allows you to create complex materials and textures using nodes, in Spline you can achieve a wide range of expressions by combining material layers.
This stage involves a lot of trial and error—tweaking values and layer modes over and over—and sometimes those “unexpected accidents” turn out surprisingly well.
3D Modeling, Materials, and Animation Settings for the Main Objects on Each Island
Next, I began modeling the main objects for each island based on its theme.
For example, the Web Design service island features a desktop computer, the Music-themed island has a record player, and the Japan-themed island includes a torii gate.
I selected a motif for each island according to its theme and moved forward with the design.


Since the lighting and color assets were decided early on, I was able to complete each 3D asset—from modeling and material setup to animation—in one go.
With around ten islands, the number of 3D models I had to create was inevitably large.
On top of that, I was working on them alongside my regular projects during the hackathon period, so I think this 3D asset design phase was the most time-consuming part of the process.
Character Design and Modeling in Spline

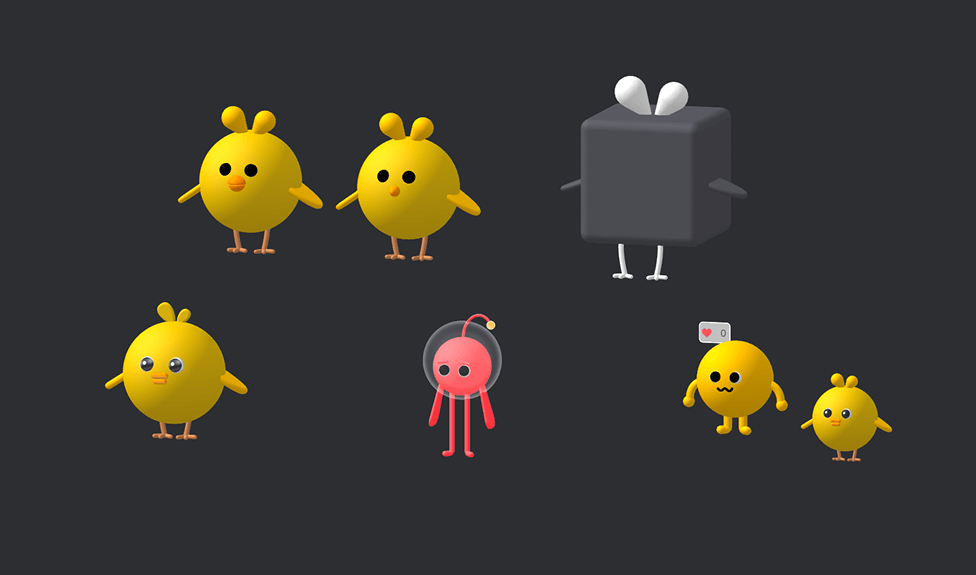
Once the main objects were completed, the full view of the islands finally began to take shape. The next step was 3D character design.
I created several variations of the character designs and finalized them after getting feedback from friends.
The characters have simple shapes, but I like how their head parts bounce slightly and how their overall look is cute with a slightly goofy expression—just the way I envisioned.
I created and managed each main object, character, and smaller element in separate Spline scene files from the island field scene.
Once the designs were finalized, I merged them into the main island field scene.

Modeling Smaller Detail Elements in Spline
Once the modeling and animation for the characters and main objects were completed, I reviewed the entire island layout from a bird’s-eye view.
I decided to add extra objects in areas where empty spaces stood out.
However, since I didn’t want to increase the overall scene size, I used the clone function to duplicate existing objects and adjust their sizes.
Examples include trees and small stepping-stone islands placed between the main islands.

Adding a Mailbox CTA for Inquiries
As the final 3D object, I created a mailbox in Spline to serve as a call-to-action (CTA) leading to inquiries about my website or portfolio.
When a character approaches, the lid opens and a button appears.
Each button contains a hyperlink to the respective website, and clicking it opens the linked webpage.

Material Settings for Data Size Optimization
To keep the Spline scene size to a minimum and make color management easier, I registered all material colors in the color asset library.
By assigning colors from this asset library, I no longer needed to create new materials each time, which made the design process much more efficient.

③ 3D Game Control Settings in Spline
Playable Character States and Animation Settings
While keeping the shapes simple to reduce scene size, I added detailed animations to the playable characters (the chick and the alien) so that their facial expressions change when they jump.

To make the movements feel more natural, I added a slight time offset between the animations of the arms, legs, and head parts.
I began by placing a placeholder model in the 3D scene to check the scale between the character and the island’s objects, as well as to fine-tune the distance for “distance events” (animations triggered when the character approaches an object).
For collision detection—the area where two 3D objects are considered to be colliding—I used capsule-shaped colliders.
I adjusted the range by moving the character within Spline’s preview scene to find a balance where the distance was neither too close nor too far.

If the collision range is too close, multiple objects in a crowded area can be triggered at the same time.
On the other hand, if it’s too far, players might not notice that there’s an interaction (some kind of trigger) available.
I worked to find a gameplay balance that would be enjoyable even for people who aren’t very familiar with games.
Adjusting Character Movement Range and Environmental Object Scale
To ensure the playable characters could still move around the island even if they fell off a bridge, I added small platforms.
By placing these platforms a suitable distance from the islands, I incorporated a gameplay element where players need to jump (using the space key or tapping) to cross successfully.
Additionally, to limit the character’s movement range within the Spline scene, I placed invisible walls around the islands.
This prevents characters from wandering into unintended areas, while still allowing them a certain degree of freedom to swim and explore the surrounding sea.
④ Interactive Settings and Variable Integration in Spline3D
Adding Interactive Animations Triggered by Character Actions
For most of the main objects, I set up animations or interactions in Spline so that when the character approaches, they trigger and activate an “action” defined in Spline.
This approach adds playful elements throughout the scene, encouraging visitors to explore every corner of the island.
On the island themed around my Rive animation services, I also used Spline’s physics engine.
When the character reaches the top block, a hidden achievement is triggered—a decorative ball (kusudama) bursts open.
Spline3D Variable ① Real-Time Time Display
One of the personal rules I set for this project was to use Spline’s variables.
Unlike Blender or Cinema4D, Spline not only supports 3D design and interactive animations, but it also allows you to implement variables—something that used to require advanced programming skills.
I wanted to make full use of this unique strength of Spline.
That said, my programming knowledge is at a beginner level, so I chose to work with relatively simple variables: a “time” variable and a counter variable.
The time variable is linked to digital clocks placed toward the back center of the island.
There are two clocks: the red clock on the left shows the player’s local time, while the blue clock on the right shows my local time in New Zealand, both updating in real time.

Based in New Zealand and working with clients worldwide, I wanted to add a touch of global connection.
This feature also helps visitors to the interactive portfolio island feel more immersed and personally connected.
Spline3D Variable ② Counter: Collecting Star Keys Hidden Around the Island
The other variable is a counter.
I placed 10 star keys throughout the island. When the character touches a star key, the counter in the upper-left corner of the screen increases to show the number of keys collected.
Since this variable setup was a bit complex, I experimented with it in a test scene before starting the interactive portfolio project.
I referred to several shared data examples from the Spline community to better understand how the mechanism worked.
By scattering the star keys across the entire island, my goal was to create an interactive portfolio that would make visitors think, “I want to explore every corner of this place!”
Gamification: Designing the Achievement Unlocked by Collecting All Keys
When all 10 star keys are collected, an achievement is unlocked. Ever since I was a child, I’ve loved games like Kirby and The Legendary Starfy.
The combination of gaming as entertainment and creative expression has shaped my design style and inspirations, so incorporating this element into my interactive portfolio was something I really wanted to do.
I imported MP4 sound effects into Spline, so that a sound plays both when a star key is collected and when all 10 are gathered.
For the achievement, I added fun elements such as a crown appearing above the character’s head, the symbolic FUJI (Mount Fuji) appearing at the center of the island, and a rainbow stretching across the background.

By the way, the smoke puffing from the top of Mount Fuji is created using Spline’s particle system.
I hope you’ll try playing LITTLE FUJI Island yourself and aim to unlock the achievement!
⑤Integration with Wix Studio and Linking with Velo
With all the Spline-side work completed, I moved on to the final step—integrating the project into Wix Studio.
As of August 2025, Wix Studio does not have a built-in feature to add Spline as a component, so the only way to integrate it is by using custom code.
The hackathon rules included bonus points for creating the project in Framer or Webflow. I tried using Webflow as a test, but I wasn’t comfortable with its workflow.
Since I normally use Wix Studio as my main platform, and I wanted to combine Spline with my own services and skills in future projects, integrating Spline with Wix Studio became one of my main challenges.
Integrating Spline3D with Wix Studio: Triggering Wix Events from Actions in the Spline Scene
When I first tested on the Webflow side, I was able to trigger interactions in Spline scene objects from Webflow events (such as clicks).
However, what I wanted to achieve this time was the opposite.
In other words, I wanted an event that occurred within the Spline3D scene to trigger an action on the web browser side.
To do this, on the Spline side, I added a Mouse Down event (mouse click on desktop, tap on mobile) to the blue question-mark boxes placed on the island.
The most challenging part was the Wix Studio setup.
On the Wix Studio side, I created the same number of lightboxes as there were question-mark boxes.
In Wix Studio, I created a new page, loaded the Spline 3D scene via custom code, and set it up so that lightboxes would pop up over it.

However, to display a specific lightbox only when interacting with a designated object (the question-mark box) set up in Spline, the only current option was to configure custom code in Wix’s Velo.
Since I had never used Velo before, I sought help from Wix Velo developer Mr. Niibori (N5-Creation), whose expertise made it possible to link the Mouse Down event of the Spline object to the lightbox action in Wix Studio.
In Spline, each 3D object is assigned a unique Object ID.
I used this Object ID to identify the question-mark box that would trigger the event.
Adding a Loading Screen in Wix Studio
In the end, the Spline 3D scene data size reached 2.8 MB.

Since it was being loaded through Wix Studio, the 3D scene inevitably took some time to load. To address this, I added a loading screen on the Wix Studio side of the page.

For the loading screen background, I used blurred images of the island and actual gameplay scenes to create a sense of excitement while waiting.
This idea was inspired by the loading screen in Animal Crossing, shown when using Dodo Airlines to fly to another island.
Device Testing for Spline and Wix
Once the integration between Wix Studio and Spline was finally set up, I conducted device testing as the last step.
While I had already checked the Spline3D scene alone on desktop, tablet, and smartphone—making adjustments to scale and placement as needed—after integrating it into Wix Studio, I noticed the loading time felt longer.
To address this, I reluctantly removed some 3D objects, such as clouds, and managed to reduce the size to under 3MB.
I believe that optimizing Spline 3D scene data size and addressing loading times after integrating into a website or app will remain ongoing challenges in the future.
Pushing the Possibilities and Limits of Spline3D
That concludes the production process of my 3D interactive portfolio, LITTLE FUJI Island, created in Spline.
In addition to modeling all the 3D assets in Spline, at that time LITTLE FUJI didn’t even have service subpages—so I was also creating the service list page and service detail pages in Wix simultaneously.
It was quite an intense schedule. I spent about a week working until dawn, and while it was exhausting, I felt a great sense of accomplishment in managing to submit the project and participate in the hackathon.
On the flip side, I realized that without the time limit of the hackathon, I probably wouldn’t have even started on the website subpages.
It reinforced for me the importance of setting deadlines for personal projects as well.
Techniques for Optimizing Spline 3D Scene Data Size
For this project, in order to optimize the 3D scene data size, I modeled all the 3D objects entirely within Spline.
Although Spline allows mesh editing and increasing subdivision values, adding more meshes (polygons) inevitably increases the scene size.
To avoid this, I shaped objects with the minimum number of meshes possible.
In addition to combining basic shapes, I sometimes converted them to meshes for editing, allowing me to create slightly more complex forms while keeping the polygon count low.

The Multi-Dimensional Potential of Spline’s 3D Design and Interactive Capabilities
I’ve been using Spline for about a year and a half now, but before that, I worked with other 3D software such as Blender.
Among them, Spline stands out for being so easy to use that it actually made me enjoy 3D modeling—a task I used to struggle with.
Most impressive of all, it allows designers without programming knowledge to easily create both 3D models and interactive settings.
That was a real revelation for me.

As stated on Spline’s website, I believe Spline is an innovative 3D tool that can collaborate with a wide range of design fields.
👉Try Spline from here!
In May 2025, I had the opportunity to appear as a Spline Expert Designer in a live event alongside Caroline, Spline’s CCO, and Allison, Head of Product at the freelance platform Contra.
During my conversation with Spline’s CCO, Caroline, one phrase really stuck with me: “Creating multi-dimensional design with Spline.”
It resonated deeply because it aligned perfectly with the kind of design expression and approach I had been aiming for.
Rather than ending 3D design at a static 3D illustration, image, or animation, Spline makes it possible to integrate it into apps, websites, AR, and other platforms—delivering an interactive 3D experience that users can touch and move.
I believe this is one of Spline’s most unique and exciting strengths.
In fact, for many of my Spline 3D projects, my clients have been product designers and engineers.
Most of the time, I work alongside professionals from other fields to develop these 3D designs collaboratively.
Moving forward, I want to continue using Spline to create multi-dimensional creative designs that blend 3D with a wide range of devices and contexts.
Conclusion: What I Learned from Creating a 3D Interactive Portfolio with Spline
A portfolio designed to spark curiosity and invite exploration
This Spline-based 3D interactive portfolio project was a significant challenge for me.
I was designing characters and game elements, modeling in 3D, setting up materials, creating interactions, and designing the web pages—all at the same time. Naturally, I worried whether I could finish everything on time.
But once I started, I found the process incredibly fun. Creating a game had always been one of my dreams, so being able to make that happen through Spline was deeply rewarding.
With the concept of “a small world full of my personality” and “a portfolio that makes users want to explore and discover”, I was able to capture the essence of what I love to design, what inspires me, and the kinds of creations I want to pursue in the future.
Through LITTLE FUJI Island, I hope people can get a sense of the joy of 3D design, the creative potential of Spline, and perhaps learn a little more about me and my design studio, LITTLE FUJI.